french-e-motion
Hauptmenü
Peugeot 605 Pick up Part II
Peugeot > Peugeot 605
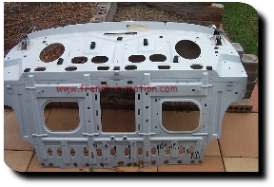
With the rear door openings braced from B to C pillar it was time to remove the rear
seat bulkhead panel and parcel shelf. The best way to remove spot welded panels is to
grind the spot welds down to the base metal; this leaves you with a nice clean
surface with no holes in for later.
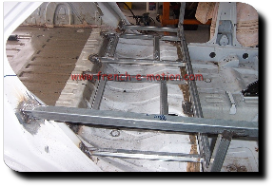
Having a clear floor now from boot lip to the front of the back seat frame it was time
to make up the framework to support the tray deck over the rear seat area. This
framework is made up from 35X35X1.6 RHS. This is also one of the easier welding
jobs as there is very little chance of distorting anything! Although Kay reckons
my mind is a little distorted.
The first tricky job of the conversion was next, to extend the rear overhang and tray
length by 150mm. The outer body panels were cut just behind the rear wheel arch, the
reason here is that there is less curvature of the body in this area and it will be easier to
maintain a smooth continuous profile down the side of the vehicle.
The cut across the boot floor is staggered and only 100mm from the boot lip; this was
done to enable the standard spare wheel and exhaust mounts to be used. It also means
that the only electrical wires to be extended are the tail light wires.
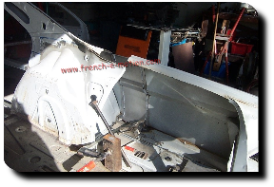
With the rear of the car cut off I manufactured a pair of frame rail
extensions to fit inside the existing rails. These required a fair bit of work as the rails
are tapered from the top to the bottom and also from front to back, Mr Peugeot didnt
make it easy for me!
The welding of the extensions in place and then reattaching the rear of the car was not
much fun! Sitting under the car body getting showered with sparks is an absolute
pain, it is however the only bit of the conversion that requires overhead welding
work.
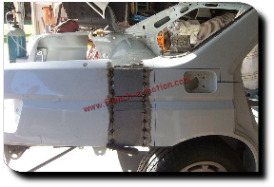
The next job was to fill the 150mm gap in the body on each side. Welding modern
bodywork is not the easiest job! You see, they make it very thin and also, in the case
of the 605 they used zinc coated steel. This coating needs to be ground off to prevent
splatter and get good weld penetration. I also used zinc coated steel to make up my
filler panels but I used 1mm thick plate and I pressed a step along the edges so that I
could overlap the panel on the inside. This gives you support to weld to, acts as a heat
sink to prevent distortion and makes it easy to line up the panels.

The welding is then done in a series of short spots allowing the welds to cool between
each spot, this also prevents distortion.
With the side panels welded in the next job was to fill the gap in the rear boot floor. I
also added an additional cross brace to help stiffen the floor and to provide a mount
point for the rear exhaust bracket.
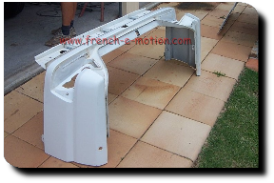
This was very straight forward work. Next up was cutting down to floor level the rear
panel and boxing in the sides to allow for a tailgate instead of a boot lid. Since I am
going to retain the look of the sedan from the rear, there is a fair amount of intricate
work involved in the tail gate and hinges. I havent found the hinges for this yet and I
suspect that I may have to make them myself.
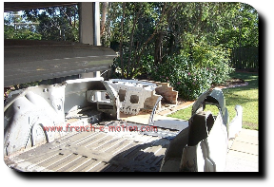
A visit to my friendly sheet metal shop to pick up some plate pieces and to drop off
the patterns for the combing rails, and it was time to cut the rear roof section off the
car. This is where you find out if you have braced the body correctly. Luckily it didnt
collapse in a heap on the floor and the way it cut indicated that there were no built up
stresses in the structure as well.
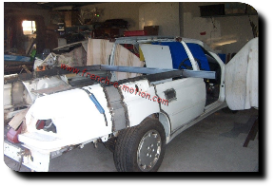
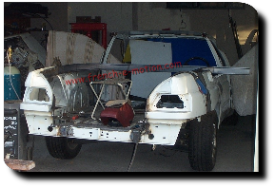
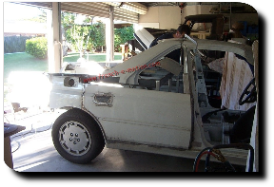
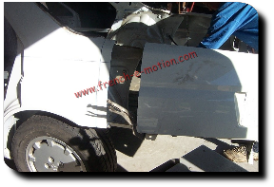
Since I am re-using the rear section of the roof and C pillars I cut another 480mm out of
the rear roof section. The rear doors were now subjected to the to the angle grinder and air
saw. The door skins were cut off the main door frame, but the hinges were left on so as to
help align the door skins for welding into the body. Two additional horizontal braces were
welded into the door skins to help with stiffness. Welding the rear doors was a very timeconsuming
exercise as large panels distort easily when being welded.
With the side profile of the body completed it was time to weld in the combing rails. These
are the frame stiffening rails that run along the top edge of the ute body. These were
formed up from 1.5mm black sheet steel in two interlocking C sections, each 25mm by 70mm with a 15mm return for fixing
cover panels on the inside of the ute well. The new sections of the outer body top edge will also be attached to the rails.
So far I have used about one and a half bottles of Argon gas, one 5kg roll
of .6mm welding wire and sheet steel sections that I have had formed up have
cost me $100. I have also used up nearly all the odd bits of sheet steel that
I have had lying around the shed.
Thats it until next month when you find out if the roof fitted! Back to the affliction Richard
As with all of these sorts of projects, the best indication of how well things are going is the amount of scrap and shavings that you produce! In this case it is metal filings from all the cutting and grinding. So far I have swept up three 9 litre buckets of the stuff and I think I will have to empty the old vacuum cleaner soon! Its getting too heavy to lift and it doesnt suck too well at the moment.
Thats it until next month when you find out if the roof fitted! Back to the affliction Richard